
Celina Tent has an obsession with sidewalls (if you haven’t noticed). They simply fill a niche that otherwise is left wide open (puns!). So while we do like to expound upon all of the styles – windowed, printed, etc. - there is still one topic we need to discuss: Usage.
The Basics
“Why, a sidewall is a wall on the side of the tent – it’s right there in the name!” you may be yelling at this blog post. And you’re correct. The standard sidewall made by Celina is designed to be compatible with tents from other manufacturers, allowing our customers to purchase sidewalls from us and not have to rebuy their entire tent.
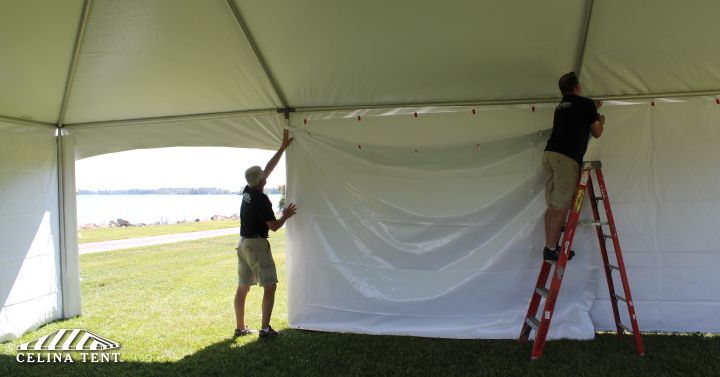
Celina Sidewalls are made with a line of spring clips along the top, attached to the sidewall with colored tabs. These tabs are color-coded to tell you the length of the sidewall. A red tab means that it is a 30’ (9.1 m) wall, while a yellow tab indicates 20’ (6.1 m). Sidewall heights are not indicated. The spring clips attached via the coded tabs clip to the line of rope that is on the interior of the tent top fabric.
Each end of the wall has quick release buckles, at the very edge and set back in toward the middle of the walls, on the “interior” side. These are used to connect sidewalls together. The walls will overlap, creating a tight barrier against wind and rain. These clips can be left apart if additional walls aren’t used.
The Advanced Course
So now you’ve graduated from common use and want to get a more in-depth look at sidewalls. Congrats!
End Wrapping
In the previous section we mentioned the quick release buckles on the ends of each wall. While they connect separate walls together, they can also be used to make your sidewalls smoother. When the sidewall ends, the very edge can be wrapped around a tent leg and secured to itself. Once the side release buckles are secured, the wall will be pulled snug around the leg and create a smooth edge that won’t flap around in the wind.Staking
The discerning tent user will note that in the common installation, the bottoms of the tent sidewalls are free to billow and move, with the tent legs keeping the walls from moving too far into the tent’s interior. Staking fixes this, but not in the way you’d think.
Along the bottom of our sidewalls is a line of grommets or eyelets – the metal rings with holes in the middle. These are used during staking to keep the wall in place. To do this, you’ll need stakes and a line of rope; the rope will be run through the grommets, and the stakes attached to the rope to hold everything in place. This keeps the stakes from tearing the sidewall should strong winds kick up at any point.- Sand Bags
Oh no! Your tent is installed on a surface you can’t stake! In this case, we recommend the use of sand bags to keep your walls in check. These are used in the same was as stakes, with a rope run through the wall grommets and the bags attached to this line. Sand bags tend to take a little longer to install, as each bag also has a line of grommets, which will be threaded with the rope that is being fed through the wall grommets. This creates an extremely secured connection at the expense of a longer installation.
See? Sidewalls are a very simple and straightforward addition to any tent installation, and can be secured to create a smooth finish and more stable appearance at the discretion of the installer. With so many options, how can you go wrong? Sidewalls can be ordered 24/7 on our website GetTent.co.uk, with additional styles, fabrics (including mesh and clear vinyl), and custom printed available as well. Give us a call at 0115 794 0041 or peruse our US-based site, GetTent.com, for even more options!
We Have Sidewalls ... Now What Do We Do?